Winter storm 2023 academic website tutorial using Hugo
Pre-requisites
- need homebrew installed (for Mac)
- need to install Hugo
- (optionally need to make a netlify account)
- need a github account
Setting things up locally:
Follow the quickstart guide to get a site up and running quickly: https://gohugo.io/getting-started/quick-start/ (written again below)
- create the site using the commands below
1hugo new site {site name} 2 3cd {site name} 4 5git init- This is what our directory will look like
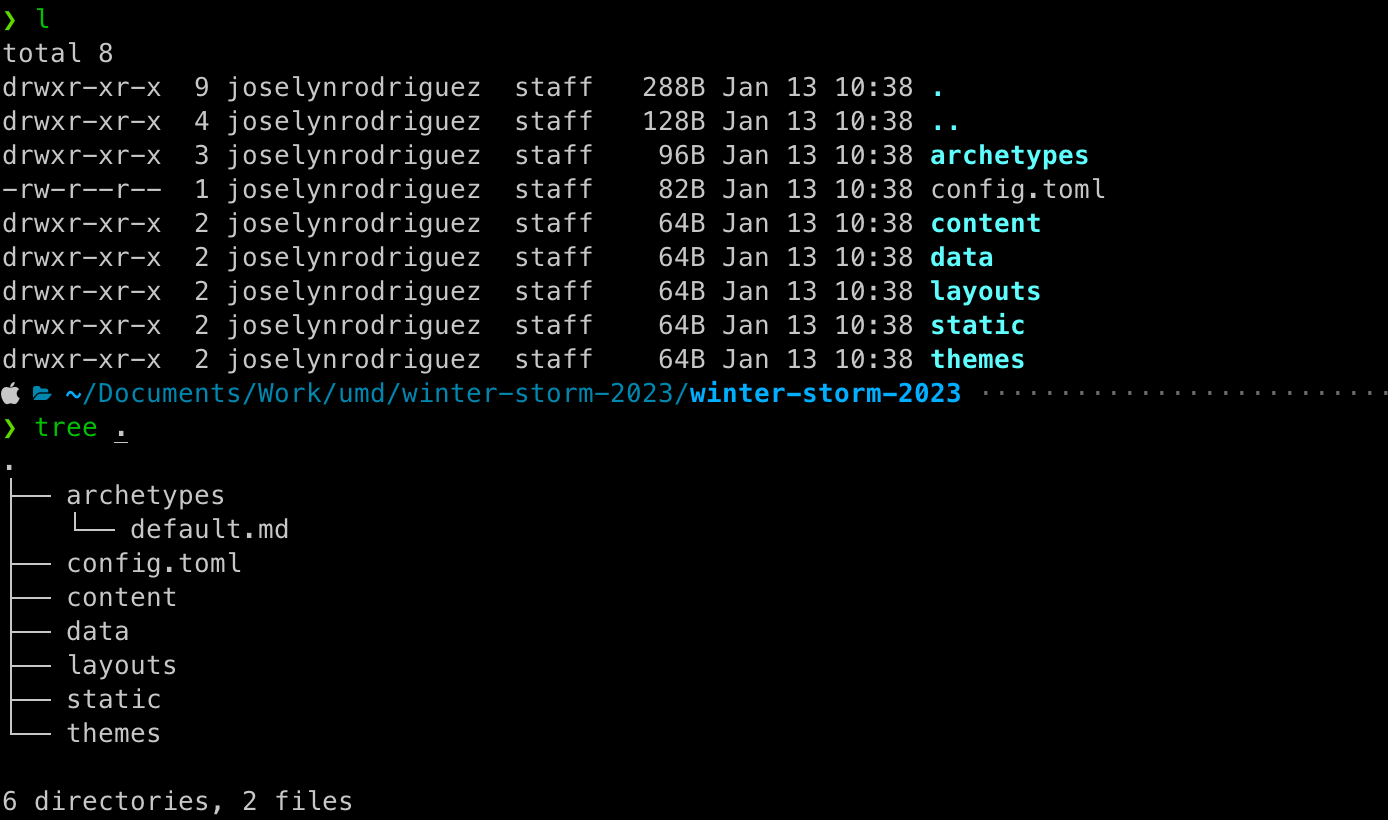
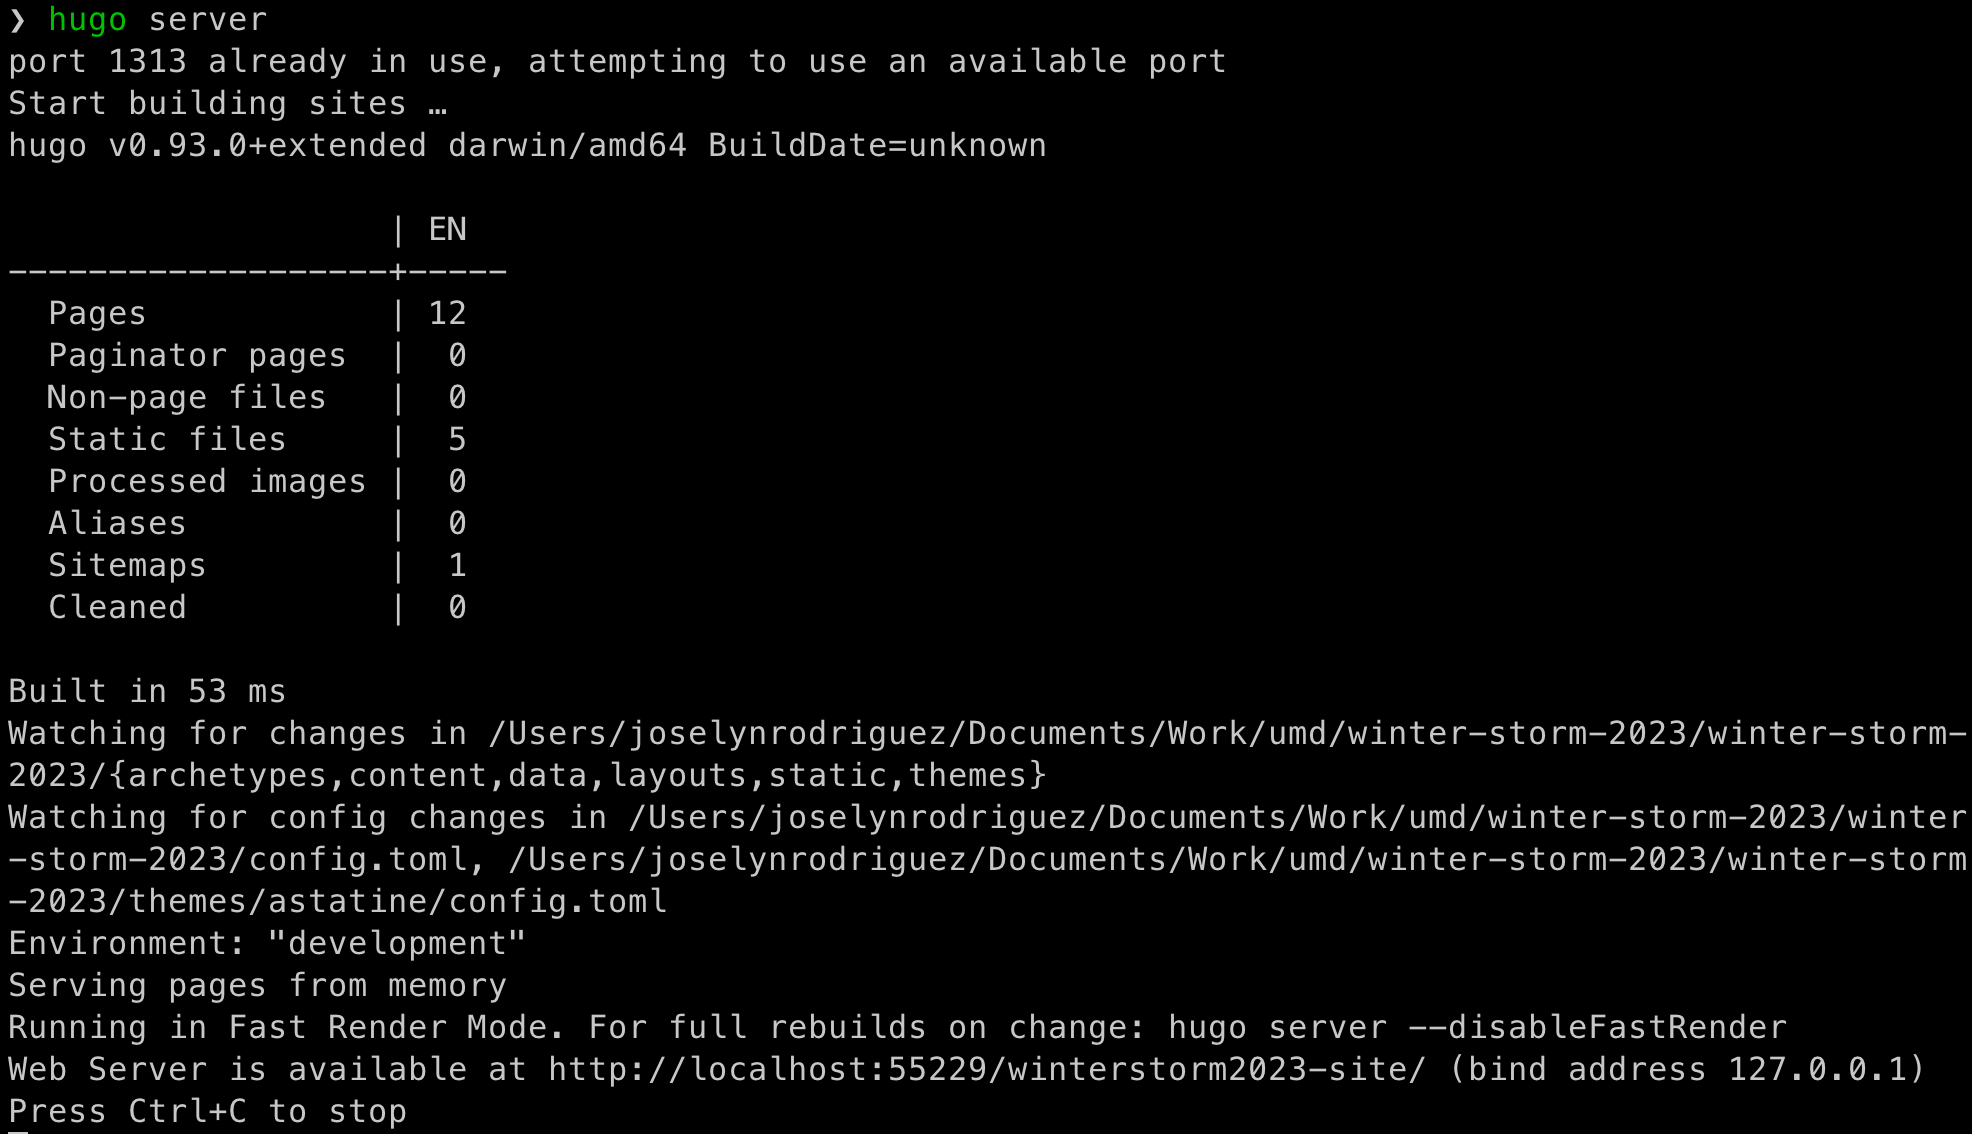
- we can start our local server right away so we can see changes as we make them. In your terminal in the main directory of your folder, type
1hugo server- this will start your local server so we can see our changes as we make them. Go to your local server (generally it’s just http://localhost:1313/) (it should be a blank page for now!)
let’s take a closer look at the config.toml file
- in your main directory, type the following to open the file in your terminal.
1nano config.toml 2- We can see the file below. This file shows us the main information for our site so far. The config file will contain the paramters for our website which will be very important. Generally themes will make heavy use of the parameters in this file. Read more about it here: https://gohugo.io/getting-started/configuration/
baseURLrefers to the URL for the site. This will change when we update our url for github pageslanguageCoderefers to the language of the site (Hugo has support for many different languages)titleshould be pretty self-explanatory.- these parameters can be accessed anywhere else in your website which is why most themes will make heavy use of this file.
1baseURL = 'http://example.org'
2languageCode = 'en-us'
3title = 'My New Hugo Site'
There’s not really much in here yet, so we’ll add to it. First we need a theme.
- Find one you like here: https://themes.gohugo.io/
- I will be using this one (and suggest you use the same, but feel free to use another one if you’re up for the challenge)
- once you’ve picked a theme, type the following line in your command prompt replacing the necessary blanks with your theme information:
1# adding the theme as a submodule is super important! It won't work correctly if you don't do it this way! 2git submodule add https://github.com/{your-theme} themes/{name of theme}- This adds in the theme as a submodule of your current repository. This means that you’re telling github where to find the repository you want without actually copying all the information into your own repository (handy!)
- Now we can add in the theme information to our config file with the following line of code in the terminal.
1# take a look inside this config file! 2echo "theme = '{name of theme}'" >> config.toml 3- let’s go ahead and open the file itself again using (you can also open all this in a text editor)
1nano config.toml- we’ll see the following lines now:
1baseURL = 'https://joselyn-rodriguez.github.io/winterstorm2023-site/' 2languageCode = 'en-us' 3title = 'Winter Storm 2023 academic website tutorial' 4theme = 'astatine' # you'll see your theme name!- before it’ll work, we need to add one more line (for use with github pages). add the following line to this file below theme:
1publishDir = 'docs' # this line is important for github pages!Theme specifics
You have to take a close look at the instructions for the theme that you want to use, different themes make use of different ways of putting a site together.
- what is necessary in the config file? Generally the theme instructions will tell you. Here, we’re told to look at the example config file (copied below)
- we only need to copy from line 14 down.
 1# This is the configuration file for the example website of the Hugo theme
 2# Astatine (see https://github.com/hugcis/hugo-astatine-theme).
 3#
 4# The URL from which the site will be served
 5baseurl = "https://hugcis.github.io/hugo-astatine-theme/"
 6# Language used
 7languageCode = "en-us"
 8# Website title
 9title = "Astatine Theme"
10# Theme used
11theme = "hugo-astatine-theme"
12
13###### FROM HERE DOWN IS WHAT WE NEED ######
14preserveTaxonomyNames = true
15rssLimit = 10
16paginate = 10
17
18# Code highlighting
19pygmentsCodefences = true
20pygmentsStyle = "native"
21
22# Taxonomies (only tags and categories are supported out of the box but you can
23# add more)
24[taxonomies]
25    category = "categories"
26    tag = "tags"
27
28# Configure permalinks style
29[permalinks]
30    post = "/:slug/"
31    page = "/:slug/"
32
33# Configure main navbar links. They can have a weight to select the order.
34# This links to content within the content/post/ folder
35[[menu.main]]
36    name = "Posts"
37    url = "/post/"
38    weight = -150
39
40# This links to the page about.md
41[[menu.main]]
42    name = "About"
43    url = "/about/"
44    weight = -110
45
46# Make the tags and categories pages accessible directly from the navbar.
47[[menu.main]]
48    name = "Tags"
49    url = "/tags/"
50    weight = -120
51
52[[menu.main]]
53    name = "Categories"
54    url = "/categories/"
55    weight = -130
56
57# Site wide params and SEO
58[params]
59    # Site description. Individual pages can have descriptions too but if
60    # missing it will fallback to that one.
61    description = """The homepage of Astatine. This website is a demo the of the \
62    Hugo theme Astatine."""
63    # Author of the site
64    authorName = "Jack Harkness"
65    # Main image for the author. This will be the default image for SEO.
66    [params.imgname]
67        name = "img/main.jpg"
68        # Add an alt description for the image
69        alt = "Profile picture"
70
71    # Indicate if you host Katex yourself. Defaults to using the CDN KaTex.
72    # hostedKaTex = false
73
74    # Optional: add a twitter handle and mastodon handle for SEO.
75    # [params.twitter]
76        # name = "@Jack_harkness"
77    # [params.mastodon]
78        # name = "@jkharkness"
79        # host = "mastodon.social"
80
81    # Enable link to feed in footer
82    blogrss = true
83
84    # Enable pingback and webmention via webmention.io
85    # webmention = "hugocisneros.com"
86
87
88# Sitemap location (default is /sitemap.xml)
89[sitemap]
90filename = "sitemap.xml"
This site is still missing some things though. If you look in content, nothing is there yet! The theme instructions tell us we need to add in an index page.
navigate to the content folder and create a new file there using
1touch _index.mdin Hugo, files that start with “_” are special files that are generally used as a index page for a given set of pages (or like a sort of landing page). This theme uses it to display our main content page but every content folder will have it’s one
_index.mdfile.while we’re here, let’s also make ourselves a posts folder by typing and adding an _index.md file with front mattter parameter of title=posts
1mkdir posts
2cd posts
3touch _index.md
Once you created the
_index.mdfile usingtouchpopulate the file with the following content:Notice the three
---lines in the file enclosing some content. This is indicating that it is yaml front matter, special metadata, embedded inside of the content file. This content isn’t necessarily displayed on the page unless it is being called somewhere else in the html files (which it is! in this file in your directory: themes/astatine/layouts/partials/info.html)
 1<div class="head container grid sm:grid-cols-2 grid-cols-1
 2            justify-around flex-wrap items-center"
 3    itemscope itemtype="http://schema.org/Person">
 4    <div class="picture p-8 max-w-[80%] mx-auto basis-20 grow shrink"
 5        itemscope itemtype="http://schema.org/ImageObject">
 6        <picture>
 7            {{ if .Params.ImgOther }}
 8            {{ range .Params.ImgOther }}
 9            <source srcset="{{ .name }}"{{ if .type }} type="{{ .type }}"{{ end }}>
10            {{ end }}
11            {{ end }}
12            <source srcset="{{ .Site.Params.imgname.Name }}"
13                    {{ if .Site.Params.imgname.Type }} type="{{ .Site.Params.Imgname.Type }}"{{ end }}>
14            <img class="main-image u-photo mx-auto"
15            itemprop="contentUrl" alt="{{ .Site.Params.Imgname.Alt }}"
16                src="{{ .Site.Params.imgname.Name }}">
17        </picture>
18    </div>
19    <div class="mx-4 ml-8 basis-60 grow shrink-2 leading-snug text-base">
20        <a  class="u-url font-bold" rel="me" itemprop="url" href="{{ .Permalink }}">
21            <h1 class="text-black dark:text-zinc-300 p-name border-0"
22                itemprop="name">{{ .Params.Name }}
23            </h1>
24        </a>
25        {{ if .Params.sameas }}
26        {{ range .Params.sameas }}
27        <link href="{{ . }}" rel="me" itemprop="sameAs">
28        {{ end }}
29        {{ end }}
30        <h2 itemprop="jobTitle" class="text-xl my-0 border-none">{{ .Params.Personal_title }}</h2>
31            {{range .Params.Address }}
32            <div itemprop="address" itemscope itemtype="http://schema.org/PostalAddress">
33            <span itemprop="streetAddress">
34                {{ .name }}
35                <br>
36                {{ .street }}
37            </span>
38            <br>
39            {{ with .postal_code }}<span itemprop="postalCode">{{ . }}</span>{{ end }}
40            {{ with .locality }}<span itemprop="addressLocality">{{ . }}</span>{{ end }}
41            <br>
42            {{ with .email }}
43            <a href="mailto:{{ . }}">{{ . }}</a>
44            {{ end }}
45            {{ with .emailimg }}
46            <picture>
47                {{ if .dark }}
48                <source srcset="{{ .dark }}" class="email"
49                        alt="Email screenshot"
50                        media="(prefers-color-scheme: dark)">
51                {{ end }}
52                {{ if .light }}
53                <img class="email h-5 inline" src="{{ .light }}" alt="Email screenshot">
54                {{ end }}
55            </picture>
56            {{ end }}
57            <br>
58            </div>
59            {{ end }}
60    </div>
61</div>
If you want to change the pictures, you just need to add some new pics in the
static/folder and then update the link in the_index.mdfile!to make new posts, you can go to your main directory then type
1hugo new posts/{name of post}.mdall the posts are going to be written in markdown. You can refer to any markdown guide
- you can set
draft = trueif you don’t want to publish pages immediately - use any text editor to edit these files (textedit, vscode)
- you can set
In general, every theme is going to be different since people use different methods.
- For example, some things you might see:
- different CSS packages (using bootstrap, tailwindcss, etc) which will require additional downloads and preparation on your part.
- Take a look at the example site and understand the structure that the creator of the site has established
- you’ll likely need to have index files for each of the main subfolders defining the landing page for that section
- in the main folder: config.toml
- in the content folder: _index.md
- you’ll likely need to have index files for each of the main subfolders defining the landing page for that section
- For example, some things you might see:
when you’re ready to build your static pages that will be hosted, you will run the following code to build our html files to host on github.
1hugo # yes that's all!
- once everything is run and you’re ready to launch the site, you proceed to the next step which is preparing your github page.
Thing to note
- to add a cv as a link in the nav, go to your
config.tomlfile and instead of directing to a local directory (like /page/ or /about/), just direct it to your static file in static/files/cv.pdf (but only include/files/cv.pdfsince you don’t need to include the “static”)
for example
1[[menu.main]]
2name = "cv"
3url = "/files/cv.pdf"
4weight = 3
5
- everything on this site is editable. You downloaded a theme, but there’s nothing stopping you from editing that theme. Don’t like the colors? the fonts? the arrangement of the site? go crazy!
Setting up the github pages host:
assuming that you have a github account set up, create a new repository.
if you’d like to use your username, then you should name the repository the same as your username but any repository name will work
Once you’ve done this, there are still a few things left to do before your site is live
- First, we need to deal with the action command in order for Github to know how to build the site correctly.
- Copy this file into the main folder of your site: https://github.com/joselyn-rodriguez/winterstorm2023-site/blob/master/.github/workflows/hugo.yml
- Replace the branch on line 6 with whatever branch you’re launching from (probably main)
- Copy this file into the main folder of your site: https://github.com/joselyn-rodriguez/winterstorm2023-site/blob/master/.github/workflows/hugo.yml
- First, we need to deal with the action command in order for Github to know how to build the site correctly.
After that, we need to setup our github pages and activate it on this repo.
Go to settings, below “code and automation”, click on “Pages”
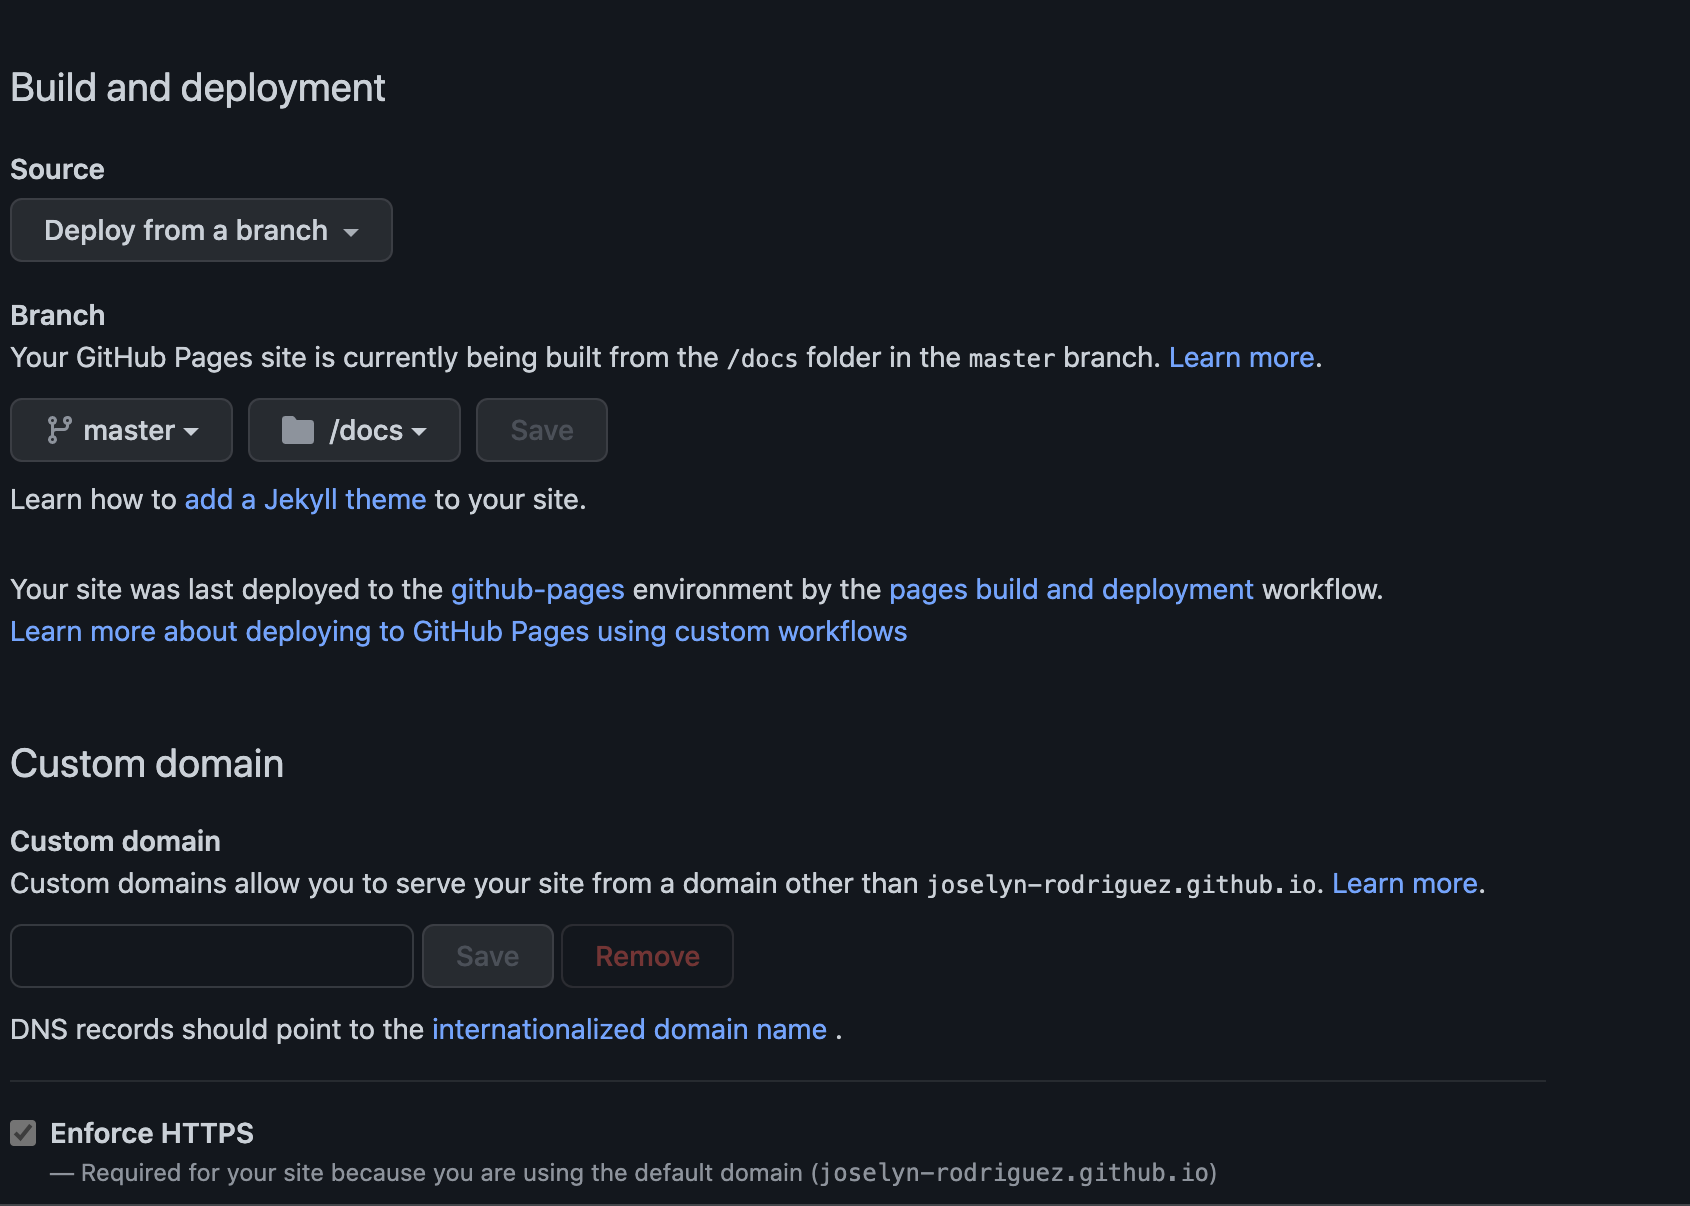
- Under “Branch” choose the branch that you pushed to (it will either be main or master) and then choose “docs” as the folder that the site is built from.
now we can actually push our files to github
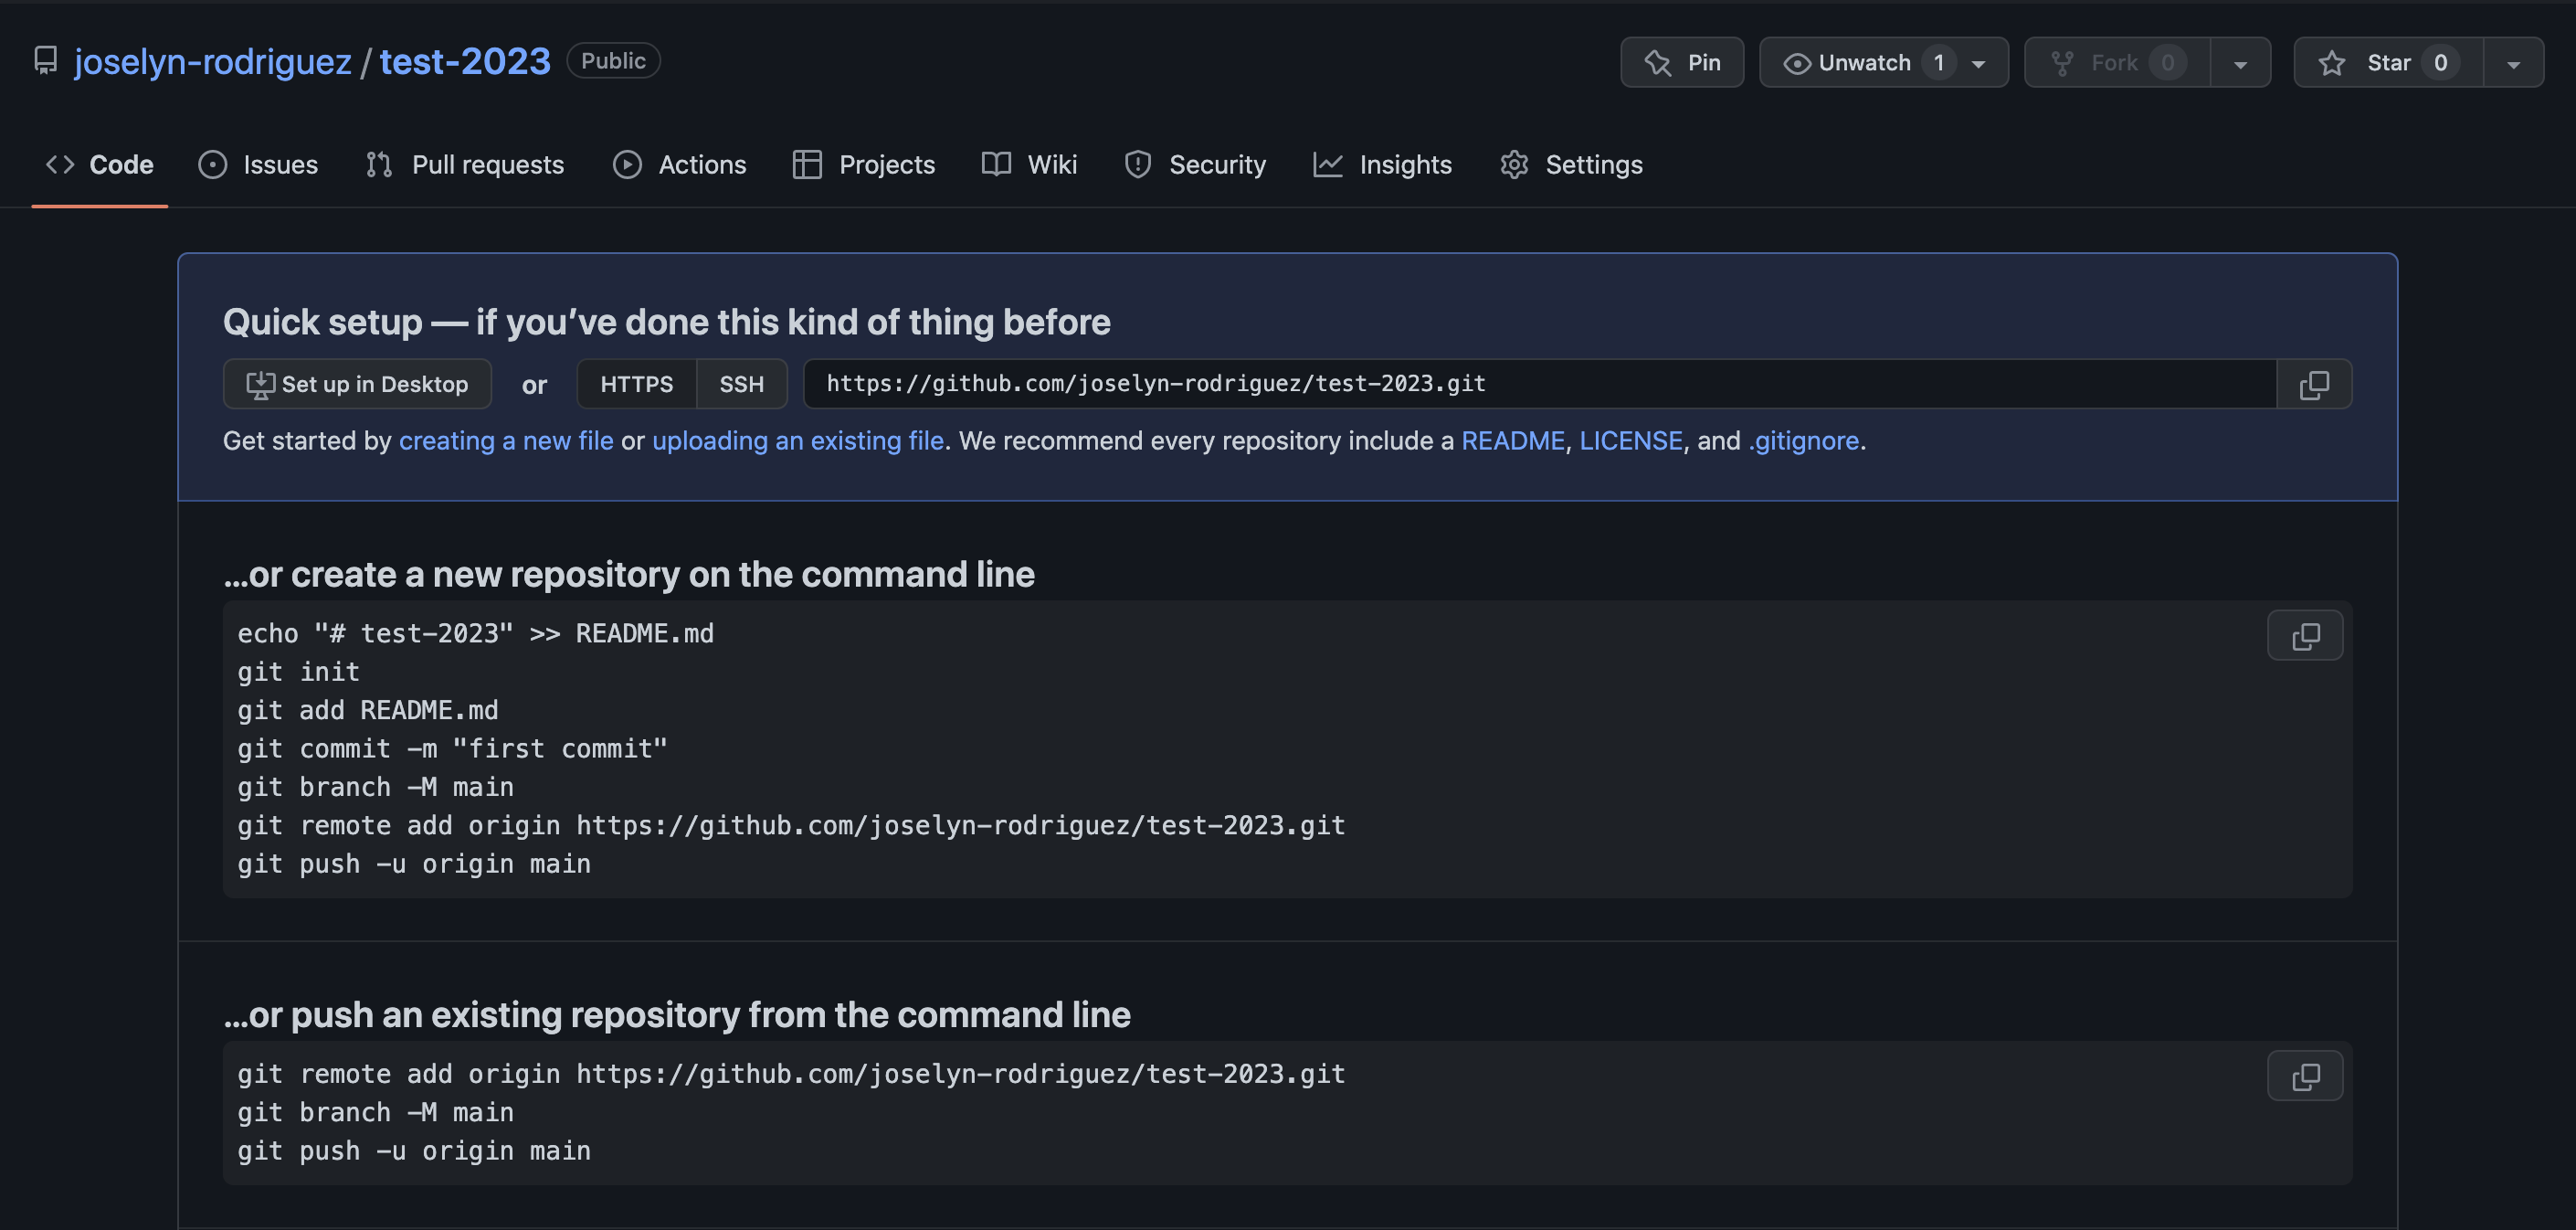
- add this repository as the remote origin to your local repository by following the “create a new repository on the command line”.
- in the repository of your new site, type the following:
1git add .
2git commit -m "first commit!"
3git branch -M main
4git remote add origin {whatever your git repo is}
5git push -u origin main
- add this repository as the remote origin to your local repository by following the “create a new repository on the command line”.
Once that is set, you can check whether it launched correctly by clicking on the link for your page

Other things!
Getting your domain name!
- there are lots of places to get a domain name
- Once you get it, you gotta head to the github documentation to get it setup in github pages (and don’t forget to change your hugo site’s
config.tomlfile baseURL parameter)
more advanced hugo-ing.
templating is a powerful tool that you can use to start customizing your website (and building your own themes)
- https://gohugo.io/templates/introduction/
- https://cloudcannon.com/community/learn/hugo-beginner-tutorial/
- this is a whole tutorial but goes into templating nicely
more on templating syntax
deploying hugo on different sites
- https://gohugo.io/hosting-and-deployment/
- I use and highly recommend using netlify
- https://gohugo.io/hosting-and-deployment/
examples of phd website using certain themes: